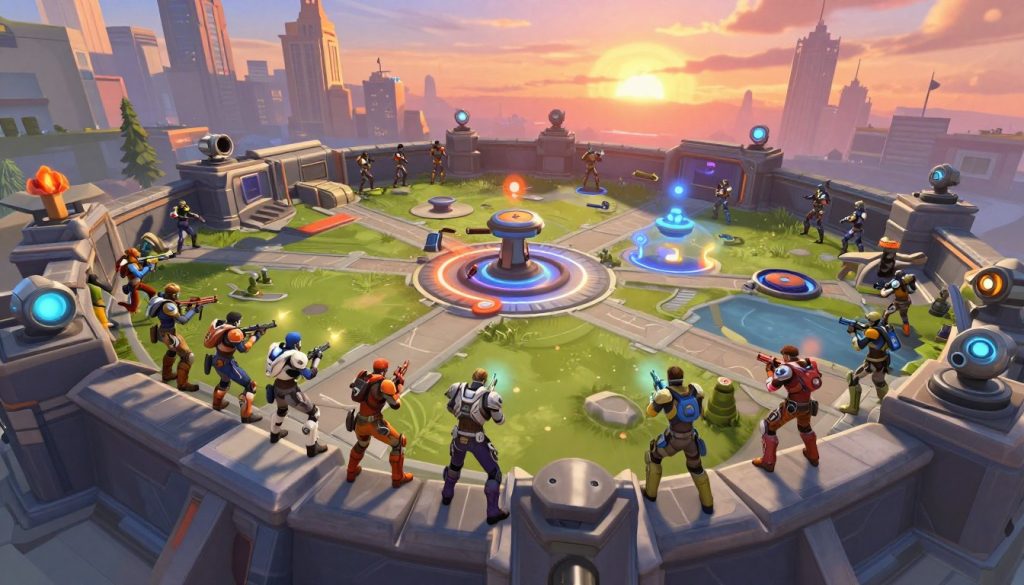
Winning in Overwatch begins long before the first fight. Map control is key to every match’s outcome. Players who learn map strategies have an edge over those who just aim.
Blizzard’s hero shooter has different game modes, each needing a unique strategy. Capture Point maps test teamwork, with second-point captures often going into overtime. Escort and Hybrid maps require smart team movements.
Push maps, on the other hand, penalize teams that ignore spawn distance.
Season 17 in 2025 brings big changes. Suravasa and New Junk City get Flashpoint reworks, and Aatlis Flashpoint map is new. Stadium mode introduces half-distance Push maps and quicker Control captures.
Teams that master spawn advantages, high ground control, and choke points have a big advantage. This guide covers all map types and tactics for climbing the ranks in the UK and global scene.
Understanding Core Overwatch Map Strategies
Every Overwatch game match is shaped by how well a team reads and reacts to its surroundings. Knowing the layout is key, but it’s the real-time application of map control tactics that makes a player great. Before we dive into specific maps, let’s understand the core principles that apply across every game mode.
The Importance of Map Control in Competitive Play
Teams that win the first fight often set the tempo for the whole round. Securing key zones like high ground and choke points gives a team space to operate freely. Effective map control tactics force the enemy into reactive, disadvantaged positions. This early momentum can snowball, pushing opponents into longer respawn walks and tighter regrouping windows.
Adapting Your Playstyle to Different Map Types
Each mode demands a distinct mindset. The differences are worth studying:
| Map Type | Primary Focus | Key Skill Required |
|---|---|---|
| Two Capture Point | Coordinated team pushes | Timing engagements together |
| Escort | Payload management and pacing | Sustained pressure and peeling |
| Hybrid | Transitioning between phases | Flexible hero picks |
| Push | Central robot control | High mobility and quick rotations |
Essential Positioning Fundamentals Across All Maps
Regardless of mode, certain positioning rules always apply:
- High ground control — elevated positions grant superior sightlines and make it harder for enemies to engage.
- Choke point awareness — defenders should hold natural bottlenecks, whilst attackers need to break through them with coordinated ability usage.
- Spawn distance management — as objectives progress, spawn advantage shifts. Attackers gain closer respawn points on successful pushes, making objective positioning increasingly favourable.
Strong objective positioning is not about standing on the point at all times. It is about occupying the space around the objective that lets a team control engagements on their own terms.
Mastering Two Capture Point Maps
Two capture point maps need a mix of bold moves and patience. Each point has its own defensive spots and attack paths. Knowing the best spots for heroes can make a big difference in winning.
Hanamura Defence Tactics: Mei Wall Choke Control
Mei’s ice wall at the main gate can lead to 1v6 scenarios. When an enemy walks through, a well-timed wall traps them. Pairing Mei with Bastion behind the centre rock adds burst damage to finish off the enemy before the wall falls. These tactics are very effective against uncoordinated attacks.
Temple of Anubis: Super High Ground Positioning
Defenders on Temple of Anubis use the high ground above Point A. Mei walls help the team reach high spots. Orisa sets up barriers, while Widowmaker or Soldier: 76 keep enemies at bay. These spots make it hard for attackers to get close.
Horizon Lunar Colony: Quad Tank Offensive Strategies
Horizon Lunar Colony is best for a quad tank attack. Reinhardt, D.Va, Roadhog, and Zarya, with Lúcio and Moira, push hard. This setup gets Moira’s ultimate in about 30 seconds, giving attackers a big advantage.
Volskaya Industries: Split Defence and Speed Boost Rushes
Volskaya is good for split defence. Shields on high ground protect players, while others hold the point below. On offence, Lúcio’s speed boosts help get to the high platform quickly. This is a key spot for heroes on this map.
| Map | Key Strategy | Core Heroes |
|---|---|---|
| Hanamura | Mei wall choke isolation | Mei, Bastion |
| Temple of Anubis | Super high ground control | Orisa, Mei, Widowmaker |
| Horizon Lunar Colony | Quad tank brawl on point | Reinhardt, Zarya, Moira, Lúcio |
| Volskaya Industries | Split defence / speed rush | Lúcio, Soldier: 76 |
Escort Map Domination Techniques
Escort maps need a deep understanding of attacking routes and how each checkpoint changes the game. Every step the payload takes shifts the power balance. Being adaptable is key to winning.
On Dorado, defenders should set up at the first archway. As the payload moves, they should switch through the left staircase to stay safe. This keeps them alive and puts pressure on the attackers.
Junkertown is a tough map. The Pirate Ship strategy, with Bastion and double shields, is very effective at the start. Teams often start with Lúcio for speed, then switch to Moira. Defenders should stay low to avoid Bastion and Widowmaker’s attacks. A surprise ambush from the right corner can catch attackers off guard.
| Escort Map | Key Offensive Tactic | Recommended Defence Setup |
|---|---|---|
| Dorado | Flank through side alleys to bypass the arch | Top of archway with staircase rotation |
| Junkertown | Pirate Ship with Bastion on payload | Ground-level ambush from right corner |
| Route 66 | Pharmercy to boop defenders off high ground | Gas station high ground control |
| Watchpoint: Gibraltar | Dive tanks to contest disrupted positions | Shield tank plus dive tank with Ana and Zenyatta |
On Route 66, Pharah and Mercy can knock defenders off the gas station. Winston or D.Va can then take the fight to the defenders. Knowing when to attack is key, as defenders respawn near the first checkpoint.
Watchpoint: Gibraltar is won by teams with a shield tank and a dive tank on defence. Ana and Zenyatta offer healing and defensive ultimates. Attackers must find weak spots in this setup. Defenders should know when to be aggressive based on spawn advantage timings.
Hybrid Map Control Fundamentals

Hybrid maps mix capture point and payload mechanics in one match. This requires flexible choke point strategies and quick hero swaps. Teams that master these transitions have a big advantage in competitive play.
Eichenwalde: Bastion Choke Shutdown Strategies
Eichenwalde’s first point has a very tight choke. A Bastion with Junkrat can block the main entrance. D.Va is key here, dealing with Pharmercy threats in the sky while Bastion takes out ground targets.
When the payload starts moving, the defence must change. Bastion’s value drops on the narrow streets to the castle. Teams should switch to mobile damage dealers like Soldier: 76 or Cassidy, who do well in flexible high ground positions near the second point.
Blizzard World: Eagle Roller Coaster High Ground Control
On Blizzard World, the Eagle roller coaster high ground offers exceptional sightlines. From this spot, teams can watch both main attack routes. The first point favours defenders, so holding the choke aggressively is key. Map-specific compositions that use this elevation can slow attackers down for a long time.
Adapting Between Payload and Point Capture Phases
Switching from capture point defence to payload escort needs smart hero changes. Here’s a comparison of ideal picks for each phase:
| Phase | Recommended Tanks | Recommended Damage | Playstyle |
|---|---|---|---|
| First Point (Capture) | Reinhardt, Roadhog | Bastion, Junkrat | Static, anchor-based |
| Payload Phase | Winston, D.Va | Soldier: 76, Cassidy | Mobile, dive-oriented |
Effective map-specific compositions change with each phase. Teams that stick to the same lineup often lose momentum. Choke point strategies that work on the first point don’t always work in the open spaces of a payload escort.
Push Mode Map Tactics for Victory
Push mode is different from escort or capture point maps. Teams fight for control of a robot on a central path. Winning early fights is key to gaining a lead that’s hard to catch up on.
Prioritising High Mobility Heroes on Push Maps
Speed is key in Push mode. Heroes like Tracer, Lúcio, and Wrecking Ball help teams get back to the robot fast. Supports need to heal well and move fast, like Moira and Kiriko, to keep the fight going.
- Tracer and Genji are great at fighting for the robot during stalls
- Lúcio’s speed boost helps the team get back together quicker
- Wrecking Ball can give teammates a few extra seconds to get back
Understanding Spawn Advantage Dynamics
As a team pushes the robot, their spawn point gets closer to the action. The other team’s spawn point moves further away, making it hard to regroup. Winning the first fight and keeping the pressure on is rewarded.
On stadium-style Push maps, the robot travels a shorter distance. This leads to intense fights where losing control is hard to recover from. Heroes like Sojourn and Soldier: 76 get an advantage from being on high ground.
Robot Control and Forward Positioning
It’s important to take forward positions before the enemy regroups. Teams should use high ground and natural cover around the robot’s path. Mei, for example, can slow the enemy push with her abilities, giving teammates time to get back into the fight.
Knowing when to push forward and when to consolidate is key in Push maps. Going too far past the robot is pointless. The objective only moves when a team is near it.
High Ground Advantages and Vertical Control
Controlling high ground is a key tactic in Overwatch. It gives players better sightlines and forces enemies into tough angles. This makes it hard for them to attack.
Heroes like Soldier: 76 and Sojourn are great at shooting from above. Echo and Pharah can fly around, making them perfect for maps with lots of height. On defence, D.Va and Winston can jump up to mess with enemy lines, stopping snipers.
Maps like Watchpoint: Gibraltar and Blizzard World’s Eagle roller coaster are all about vertical play. In Gibraltar, the ship top is a sniper’s dream. Blizzard World’s Eagle roller coaster gives great views of the first point. Dorado’s defence starts on rooftops near the archway, moving to keep up with the payload.
| Map | Key High Ground Location | Best Heroes | Strategic Value |
|---|---|---|---|
| Watchpoint: Gibraltar | Ship top | Widowmaker, Soldier: 76 | Long sightlines for sniping |
| Blizzard World | Eagle roller coaster | Ashe, Sojourn | Wide vision over first point |
| Dorado | Rooftops near archway | Hanzo, Ana | Strong defensive holdpoints above payload path |
| Ilios: Ruins | Pillared platform | Pharah, Echo | Aerial control of the control point |
Teams that focus on high ground make opponents use up their cooldowns to attack. This opens up chances for better plays and stronger positions in every match.
Choke Point Management Strategies
Narrow corridors and tight doorways are key in every Overwatch match. Knowing how to use choke points can change the game. Teams that know where to stand and how to block routes have a big advantage.
Defensive Holdpoint Selection
Choosing the right spot to hold is all about the map. On Hanamura, a Mei wall at the main gate can isolate enemies, making it a 1v6 situation. On Eichenwalde, a Bastion covering the castle entrance blocks most routes.
Temple of Anubis is all about the super high ground above the main choke. This spot gives clear sightlines across the approach. On Volskaya Industries, just one defender is needed on the left flank, leaving the main point open.
Breaking Through Enemy Chokes with Coordinated Pushes
Being aggressive alone doesn’t work against a solid defence. Coordinated plays are key. On Hanamura offence, D.Va and a DPS hero can dive through the left window for early picks. Doomfist’s seismic slam can disrupt defences from an unexpected angle.
- Use off-angles to split the enemy’s attention
- Commit to a single attacking route as a group
- Time engagements with ultimate abilities for maximum impact
Using Mei Walls and Shields for Choke Control
Mei walls are a powerful tool for controlling choke points. A well-placed wall can block healers from tanks, cut off escape paths, or elevate teammates. Shield heroes like Reinhardt and Sigma force attackers into predictable routes, making them easier to hit.
A team that controls the choke controls the tempo of the entire match.
| Map | Best Choke Tool | Key Defensive Position |
|---|---|---|
| Hanamura | Mei Wall | Main gate entrance |
| Eichenwalde | Bastion turret | Castle archway |
| Temple of Anubis | Widowmaker sightlines | Super high ground |
| Volskaya Industries | Reinhardt shield | Left flank with solo defender |
Hero Synergy and Map-Specific Compositions
Choosing the right heroes is just the start. The real magic happens when you pair them with the right map. This lets teams use the terrain to their advantage, catching opponents off guard. Each map has its own special way of working with certain heroes.
Dive Compositions on Gibraltar and Dorado
Gibraltar and Dorado are all about verticality and long sightlines. Dive teams love these maps. Heroes like Winston and D.Va can jump onto enemies, while Genji uses rooftops to escape.
Widowmaker provides pressure from above, making it hard for enemies to move. Kiriko or Ana keeps the team alive with quick healing.
Brawl Comps for Tight Corridors
Narrow spaces need heroes with close-range power. Reinhardt, Junker Queen, and Mei are perfect for tight spots like King’s Row or Eichenwalde’s castle. Moira and Lúcio heal the team, making them hard to kill.
Speed boosts are deadly in these areas, as there’s nowhere to run.
Pirate Ship Strategy on Junkertown
The start of Junkertown is great for a Pirate Ship strategy. Bastion rides the payload, while Mercy boosts his damage. Widowmaker uses the open space to attack anyone who looks out.
This setup needs teamwork but can easily clear the first checkpoint.
| Map | Best Composition | Key Hero Synergy |
|---|---|---|
| Gibraltar | Dive | Winston + Genji + Widowmaker |
| Junkertown | Pirate Ship | Bastion + Mercy + Sigma |
| Route 66 | Pharmercy | Pharah + Mercy + Sojourn |
| King’s Row | Brawl | Reinhardt + Mei + Lúcio |
Pharmercy Dominance on Route 66
Route 66 is perfect for Pharah and Mercy. Pharah can attack from above, forcing enemies to split their attention. This creates constant pressure on the enemy team.
Attacking Routes and Flanking Pathways
Choosing the right attacking routes can make a big difference. Every Overwatch map has side paths and flanking corridors. These let teams bypass the main choke and gain an edge in team fights.
On Volskaya Industries, the left flank offers direct access to high ground and the capture point. Defenders need to watch this angle closely, or they’ll be overwhelmed. Hanamura’s left window is perfect for heroes like D.Va and Widowmaker to get the drop on enemies.
Eichenwalde’s right flank is key for a strong start. It splits the defence apart. On Dorado, heroes like Genji can use ledges and elevated areas to keep pressure while avoiding damage.
“The best flanking path is the one your opponent forgot to watch.”
Knowing when to flank is as important as knowing the paths. Attackers should flank before defenders can respawn. On Temple of Anubis, dashing under the bridge disrupts defenders and opens up the main push.
| Map | Key Flank Path | Best Heroes | Spawn Advantage Timings Impact |
|---|---|---|---|
| Volskaya Industries | Left flank to high ground | D.Va, Reaper | High – short defender respawn |
| Hanamura | Left window | D.Va, Widowmaker | Moderate – staggered respawn |
| Eichenwalde | Right houses | Tracer, Genji | High – first point only |
| Dorado | Upper ledges | Genji, Hanzo | Low – long escort distance |
| Temple of Anubis | Under bridge dash | Lucio, Genji | High – tight second point |
Blizzard World’s flank paths are predictable, so teams should expect defenders to anticipate them. Newer maps like Colosseo have limited but key flanking options. These reward players who master spawn advantage timings and commit to their routes with speed and confidence.
Defensive Positioning and Holdpoints
Winning on defence is more than just standing in one spot. It’s about controlling space and denying enemy advances. It’s also about punishing them when they overextend. Each player must work together to defend, not scatter across the map.
First Point Defence Setup Locations
Every map has its own first-point strategy. On Hanamura, defenders should hide behind the middle rock. Temple of Anubis is better with a team on the super high ground near the entrance. Junkertown’s first point is tricky because of its exposed high ground. Corner ambushes near the payload path are safer.
Rotating Through Multiple Defence Positions
Staying in one spot makes a team easy to predict. Moving between different defensive spots keeps attackers on their toes. On Junkertown’s third point, teams can switch between:
- The turning gears area for close-range brawls
- The door hold for long sightlines
- Corner ambush spots for surprise engagements
This keeps the enemy guessing and forces them to change their plans quickly.
Avoiding Common Defensive Mistakes
One big mistake is when the whole team chases one flanker. This leaves the main choke open. Giving too much attention to a single Tracer or Genji can let attackers through. Also, don’t stay in vulnerable spots against a Bastion team. Always think about the enemy’s damage.
Spawn Advantage Defensive Strategies
Defenders start with a spawn advantage, but it gets smaller as the game goes on. Smart teams use this early advantage well. On Blizzard World’s second point, the close spawn lets defenders stall the final stretch. Volskaya Industries works best with a split defence — shield tanks on high ground and off-tanks below.
A strong defence is never static. It breathes, rotates, and reacts to every threat the attackers present.
Ultimate Usage Locations and Timing
Knowing when and where to use ultimates can change a losing fight into a win. Players should use their abilities with map control to get the most out of every charge. The right spot can make a good ultimate into a winning one.
Graviton Surge Placement on Two CP Maps
Zarya’s Graviton Surge is key on two capture point maps. On Hanamura’s second point, it traps defenders for easy damage. On Volskaya Industries, an early Graviton gives a big push in the attack phase. Teams should watch for enemy Zarya and use Graviton before defenses recover.
High-Value Spots Near Objectives
Some spots make ultimates more powerful. Soldier: 76 can use Tactical Visor from Hanamura’s top-right balcony, leaving little cover for defenders. Cassidy’s Deadeye from Volskaya’s high spots catches teams off guard. On Gibraltar’s first point, ultimates like Zenyatta’s Transcendence are key for survival.
Coordinating Combos with Map Geometry
Map layout boosts some ultimates a lot. Reinhardt’s Earthshatter is devastating in Eichenwalde’s narrow choke. Mei’s Blizzard covers most of Anubis’s last point due to the tight space. On Horizon Lunar Colony, a quad tank team can make Moira’s Coalescence in about 30 seconds of fighting.
| Ultimate | Best Map | Ideal Location | Why It Works |
|---|---|---|---|
| Graviton Surge | Hanamura | Second point objective | Groups defenders for team wipe |
| Tactical Visor | Hanamura | Top-right balcony | Minimal cover for enemies |
| Earthshatter | Eichenwalde | Main choke entrance | Narrow corridor traps targets |
| Blizzard | Temple of Anubis | Last point centre | Confined space ensures full coverage |
| Coalescence | Horizon Lunar Colony | On point during brawl | Charges in 30 seconds with quad tank |
| Transcendence | Gibraltar | First point payload area | Counters ultimate-heavy engagements |
Using ultimates at the right time is key. Teams that push forward after picks can stop defensive regroups. This makes each ultimate much more impactful.
Conclusion
Strong overwatch map strategies are based on a few key points. Players must control high ground, manage choke points, and choose heroes that fit the terrain. Each game mode presents unique challenges.
Two CP maps require tight team coordination. Escort maps need smart payload management. Push mode rewards those who are mobile and aware of spawn points.
The 2025 updates from Blizzard have changed how teams fight on several maps. Winning the first fight gives a big advantage. It puts the other team in a tough spot, with fewer chances to come back.
Teams that study flanking routes and coordinate ultimates with the map will do better. Adapting to each location helps players climb the ranks faster. Winning in ranked play comes from avoiding common mistakes and using spawn advantages well.
Mastering overwatch map strategies are not just about memorising plans. It’s about reading the game flow and adjusting as needed.